


Using Behmor 1600 Curves
 Roastmaster provides the ability to create curves that match those on the Behmor® 1600 roaster. Behmor curves are display in the roasting graph just like standard curves, can be copied and pasted to profiles and programs, and can be time-shifted using the same algorithms the Behmor 1600 uses when performing time-shifts on the roaster’s console.
The 1600 is unique in the way that it handles its internal roasting curves. They are calculated on-the-fly, based on 3 things:
- The Profile (the shape of the curve)
- The Program (the length of the roast calculated as a factor of the weight setting)
- The Weight setting (higher weight settings yield greater Program times).
The 1600 allows some degree of customization based on the time shifts you apply to a curve. Time shifts you enter before a roast starts adjust every leg of the calculated heat curve evenly, adjusting each leg in proportion to fit the new time. Time shifts you apply after the roast begins affect only the final leg of the roast.
How do I use them?
You can create Behmor curves on the fly the same way you create regular curves in a roast as needed, or you can have them created automatically in roasts by turning the “Auto Behmor Curves” preference on in the preference settings. Then, whenever you choose an appropriate Profile, Program and Custom “Weight” Setting that is named in a way Roastmaster can identify, it will create the necessary curve automatically.
Manual Behmor Curves
The only thing you need to do is make sure the roaster entity in Roastmaster that represents your 1600 contains the string “Behmor” in the manufacturing field. Once you tag a roaster in a roast that meets this criterion, the “Create Behmor Curve…” option will be displayed when you tap the dark blue curve button on the roasting console.
Automatic Behmor Curves
First, verify that the “Auto Behmor Curves” preference setting in the Utilities section is turned on. Then, whenever you roast, you’ll need to choose the appropriately named Roaster for your roast, followed by one of its Profile, Program and Custom Weight Settings. These three entities are defined in the Roaster definition screen, and must all be present and chosen in a roast to trigger the creation of an automatic Behmor curve.
To get started using automatic Behmor curves…
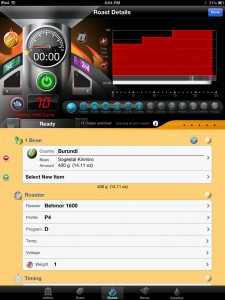
- Navigate to the Roaster section of the Utilities screen. Create a new roaster, and set the “Manufacturer” field to “Behmor”, and the model field to “1600″
- Within that roaster, create 5 Profiles, called “P1″, “P2″, “P3″, “P4″ and “P5″
- Create 4 Programs, called “A”, “B”, “C”, and “D”
- Create a Custom Setting Type called “Weight”, and within that Custom Setting Type, create 3 Custom Settings named “.25″ (or “1/4″), “.5″ (or “1/2″) or “1″.
- Save the Roaster, and you’re ready to roast.
Or, simply tap this file on an iOS device to import directly into Roastmaster.


In a new roast, simply choose that Roaster, and then the appropriate Profile, Program and Custom “Weight” Setting that correspond to the settings you will use on the Behmor itself. Roastmaster will reward you by automatically creating the necessary Behmor 1600 curve.
Note: for any of the string patterns listed, the name must either match that string, or begin with that string followed by a space – e.g. a Profile titled either P1″ or “P1 Behmor Profile” would both be considered a positive match.
How do they work?
Once you’ve created a 1600 curve, and saved it to the current roast, selecting that curve in the graph will turn the new graph scale buttons (the “+” and “-” buttons) into time shift buttons. Tapping these buttons will apply the same logic to the curve that the Behmor 1600 applies to its internal curves, with respect to whether or not the roast is currently in progress. So, for every time shift you enter on the appliance, apply the same time shift to the selected Behmor 1600 curve in Roastmaster.
If you need to look up the Behmor 1600 information contained in a 1600 curve, just go to the details screen of that curve. Swipe to the notes section – it will report the settings used to create the curve, as well as any time shifts you’ve applied to it – both before, and during, the roast.
A few words about the design of Behmor 1600 curves in Roastmaster.
Behmor curves are “opt-in”. Many 1600 users I’ve spoken with don’t care to track curves. They are quite happy roasting with the default settings, and not experimenting with time shifts. That, coupled with the fact that it is but one of the many roasters that folks are using, led me to design them to function modularly – the same way all other curves in Roastmaster work. In other words, a Behmor curve has no relationship to the details of the roast that contains it. The curve doesn’t care if you’ve tagged P1 in the roast – all it cares about is the setting you entered when you created the curve itself.
Why? Well, Roastmaster is complex enough already, and at the end of the day simpler is better. If a Behmor 1600 curve were intrinsically linked with the profile/program data of the current roast, then (aside from making the interface more confusing) it would not be a viable curve outside of the context of a roast. Having a modular design gives you the freedom inherent in all curves, and will afford you the option to create custom Profiles for the 1600, based on curves you’ve tried and had success with.
For instance, while testing the Behmor curves functionality, I happened upon a curve combination of P4/D that turns Central American beans into wonderful SO espresso! Go figure – surprised me too. The combination of the long roast time, and P4 heat ramp is a real winner.
In future roasts where I want to target this same P4/D curve, I can record the Behmor details the standard way, and rely on the graph selector strip to find similar roasts for me, using the profile, program and curve buttons. In this scenario, the Behmor curves of previous roasts would be visible in the graph behind any current curves. I could create a new Behmor curve for each roast, and time shift to match the curves from the past roast(s) shown in the graph.
I could, alternatively, copy and paste that P4/D curve into a new profile called “Central SO” that will sit along with the standard P1 – 5 default profiles, and tag only “Central SO” in the roast, ignoring the weight and program settings if I choose. In this scenario, every new roast with “Central SO” would automatically inherit that curve, and I could just look up the profile, program and time shift data in the curves detail screen, and set the Behmor console accordingly, ignoring all of the other custom Behmor settings. This would make roasting a bit quicker for often-used settings, as I wouldn’t have to do anything except tag the “Central SO” profile.
I’ve learned a lot about this wonderful little (big) roaster while coding and testing 1600 curves. I hope it sheds a lot of light and helps you hone in on some winning combinations like it did for me.![]()
Leave a Reply